top of page
Digital Media Productions
Screen Printing Project Presentation and Research
Before printing the tshirts, I have created a few mock up designs for what I thought might look good on the tshirts and what would work including the actual files that I ended up printing out for the actual emulsion burning part.
I have attached the mock-ups below and a screenshot of the actual logo I ended up printing(they can also be found in the google slideshow at the end of the page in my presentation).


I have created a prototype print, which was quite hard; mostly when it was my first time trying to print. I was quite confused honestly and had issues with the printer as it didn't want to connect to wifi.
The whole process took me over 18 hours (that includes the time we left the emulsion to dry on the canvas') which was not as bad as I thought it would be but staying up with no sleep trying to print definitely affected the finished product of the prototype.
Below I have attached pictures I have took in the process of creating the prototype and I will explain each step by step what I did.
After letting the emulsion dry, I have printed out the design on transparent paper and stuck it to the frame with masking tape.

After I have set it up underneath the UV light with a piece of glass on top of it. I then turned on the UV light and put a timer on for about 5-6 minutes.
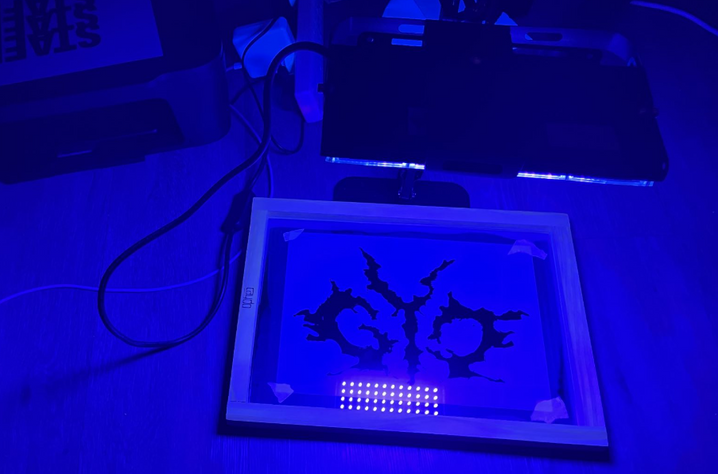
Once the time was up, I have removed the frame from underneath the uv light, removing the transparent paper and masking tape, going to the bathroom and washing the burnt in design (the yellow/lime color) off.

After washing the design emulsion off in the shower, I had to rinse the frame a bit to get rid of all the loose emulsion from the design and then had to set it up in front of a fan to let it dry, the drying depening on the fan can take up to an hour, in my case it only took about 30 minutes which was good.

After it dried, I have prepared the paint and decided to print, my only issue I only noticed afterwards was that I actually forgot to put masking tape around the frame to not let paint go through which as you can see happened around the "gyo" print. Besides that the staff print came out really well.

Below I have attached the slides for my screen printing presentation that goes more in depth about the reasearch, what prompted me to choose screen printing and more information overall about my project.
After finally creating a prototype and learning more about screen printing it's now time to create the second project which consists of a video tutorial/vlog on creating and learning how to screen print on anything.
bottom of page